There are 3 possible ways of getting album art for your music album on your Philips GoGear player. In order to be able to enjoy the album art, check the below steps:
How to save album art on my Philips GoGear player?
Published on 2017-02-28
Ways to get the album art
- Album art may be obtained from the online Music CD database that Windows Media Player uses
Note: Not all music albums have album art available in the online CD database. - From the online music store where you purchased your songs or albums, the album art may be downloaded along with your purchase
- You may also create your own album art by transferring your favourite .jpg photo into the selected album folder and rename it to 'Album Art.jpg'
Download album art from the online database (part 1)
1) Make sure that your computer is connected to the Internet
2) Launch Windows Media Player
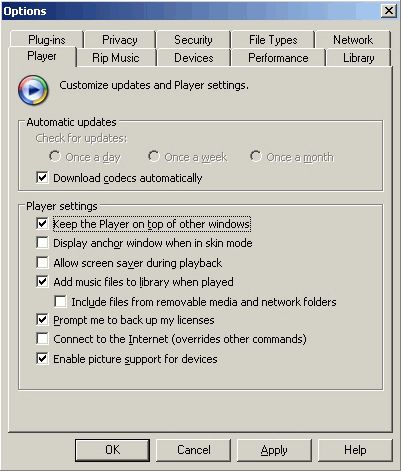
3) Go to Tools > Options > Player
4) Make sure the Enable picture support for devices check box is selected
Download album art from the online database (part 2)
5) Click the 'Apply', then the 'OK' button
6) Select the Rip tab on the task menu bar
7) Insert your music CD into the CD drive of your computer. The Windows Media Player will take a few seconds to show the content of the CD on the display.
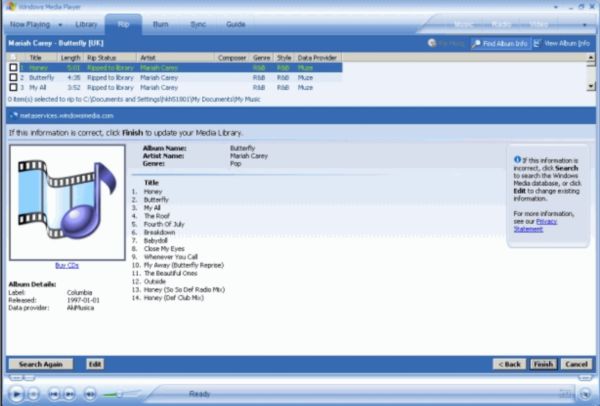
8) Click Find Album Info. The Player accesses the database hosted by WindowsMedia.com and displays information about the album in the Album Information pane. The album art will be shown if available.
Note: For some music CD, album art may not be found in any of the online database.
Download album art from the online database (part 3)
9) Click Finish to update all the information about your album and show it in the Rip pane
10) Connect your Device to the computer
11) Select the tracks that you would like to rip by clicking in the check box next to the track
12) Click the Rip music button to start ripping the music CD
13) Once the tracks are finished being ripped to the library, go to the Media library and select the songs that you have just ripped
14) Add them to the sync list and transfer them into your Device. The album art will be transferred along with those selected songs
15) Disconnect the Device from your computer
16) Make sure that the option in your device has been selected to display the album art on the device, at Settings-> Album art
Create your own Album art
- In Windows Media Player , right click on the song you want to update the album art of
- Select 'Advanced Tag Editor' option as shown (Image below)
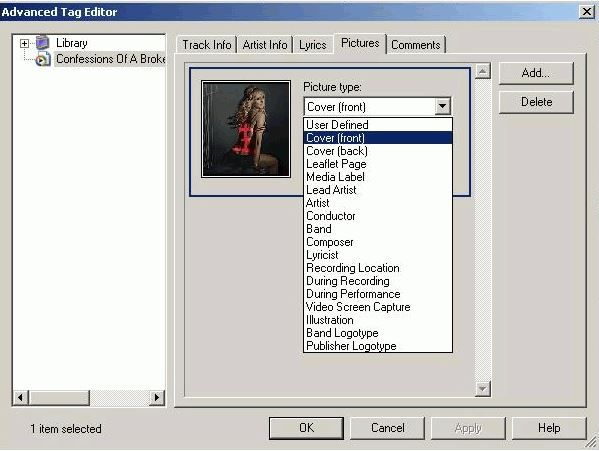
- In the screen that pops up , select the 'Pictures' tab (Image below)
- Use the drop down list to make sure that the type of picture you add is the Cover (front)
- Click on 'Add' to associate a picture as the Album art for the song and all the songs in that album
- Add this (and other songs from the same album) to the sync list and transfer them into your device
*The album art will be transferred along with those selected songs. - Disconnect the Device from your computer
- Make sure that the option in your device has been selected to display the album art on the device, at 'Settings-> Album art'
Image for Step 2 of Album art creation
Advanced Tag Editor option
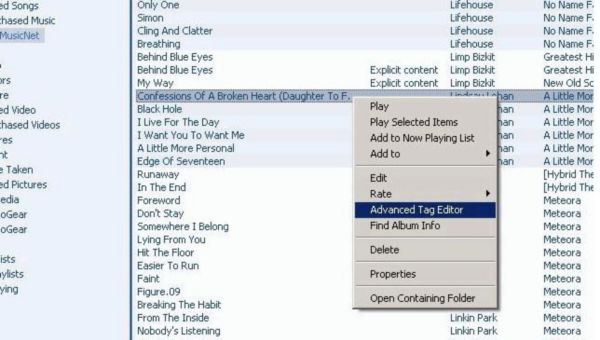
Image for Step 3 of Album art creation
'Pictures' tab in Advanced Tag Editor